Thursday, January 5, 2012

Beautiful Borders - Project by Sally Red

Beautiful borders are easy to do and add a finishing touch to your projects.  To illustrate just how and elegant border treatments can be, I have used the very versatile Victoriana Font.  
First, select the “S” from the monogram design set and stitch it out, mirror imaged, along the border of a tea towel.
Next, freehand draw a line with a water soluble pen echoing the design shape.
Finish the raw edge with a zigzag or serge stitching.  At this point, you could simply fold the finished edge under and topstitch or apply trims or binding to your preference.
To complete your towel just stitch out the monogram of choice…
and you have a beautifully bordered tea towel. A border can dress up a guest towel, too!
To see another project made with this font, look for the casserole carrier tutorial in the project gallery.  Other design sets with beautiful coordinating borders that would be perfect for similar projects would be Bindweed, Mistletoe and Poppy Font sets.  Sally Red 

Pillow For Day Bed - Project by Bobbie Berry

Assemble 3 designs from Vanity Set. Print templates and place in desired configuration.
Stitch design on Guest Towel using the templates for correct placement.  Use Water Soluble Stabilizer. Wash out WSS, dry and press.
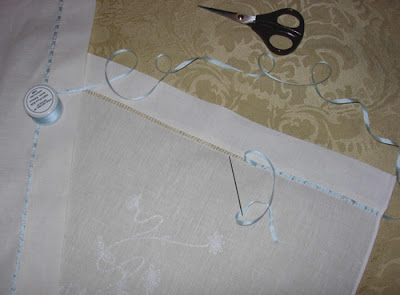
Weave silk ribbon through hemstitching and tie bow.
Stitch side seams right sides together and press open.  Stitch bottom seam. 
Make fitted cover for pillow out of a darker color than the linen guest towel pillowcase. This will make the embroidery stand out more with a darker color behind it. 
Slide pillow inside pillowcase. Finished. Bobbie Berry

Pillows with Victorian Whitework Initials by Sharon Harper

Instruction For Beige Pillow
Center monogram from Victorian Whitework Font on fabric, leaving at least 8-10 inches from each side of the monogram for project completion.  Back design area of fabric with tear away stabilizer, hoop fabric, and complete design. Remove from machine, tear away stabilizer. PRESS on WRONG side of fabric.  Cut pillow back of same or contrasting fabric. Stitch back to front, right sides together, using 1/2 seam, and leaving bottom end open for stuffing. Press flat. 
Measure 4" all the way around from the edge of the monogram design and mark with "air erase" pen. Using a winged needle and same thread as embroidery work, sew a hemstitch (or straight) ON THREE SIDES.  Make a pillow insert the size of the finished inside design. Stuff into the project design, pushing up and pinning to hold until the final hemstitch row can be completed. Complete the final hemstitch row at the bottom of the opening to finish the project. 
Instruction for White, Irish Linen Pillow
Select monogram design from Victorian Whitework FontCenter on fabric, leaving at least 8-10 inches on ALL FOUR SIDES for project completion. Back design area of fabric with tear away stabilizer, hoop and complete design. Remove from hoop, tear away stabilizer, PRESS ON WRONG SIDE.  
Sew a row of wide ribbon on each side of front, approximately 3"-4" from design area.  Center an overlay of lace over ribbon and stitch in place. To make button back, cut two pieces of fabric the height of the front with the width having a 4" overlay on the center.  Turn under and hem center opening pieces of back, adding a light weight stiffing.  Overlap and make three buttonholes on one side.  
Sew buttons on the other side to line up with buttonholes. Make pillow insert to fit, stuff and button to finish. (No exact sizes are given so that this pillow can be made to any size.) Sharon Harper